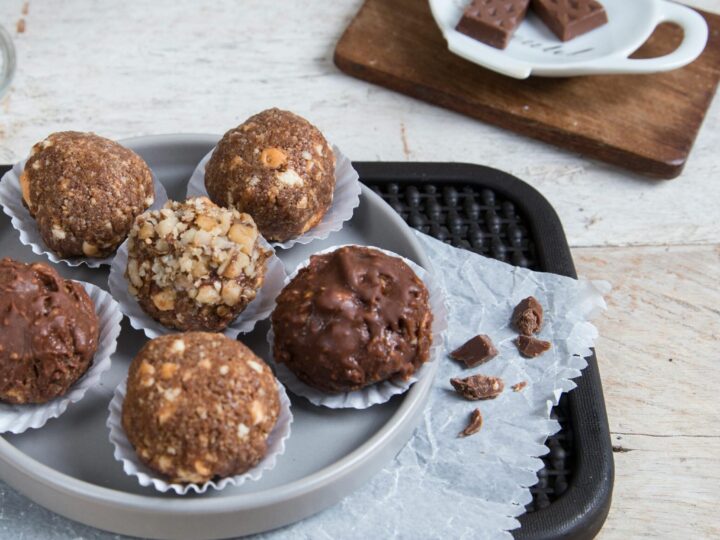
Soft, fudgy peanut butter and oat bites rolled into balls and chilled until firm. Naturally sweetened, high in protein, and ready in 15 minutes.
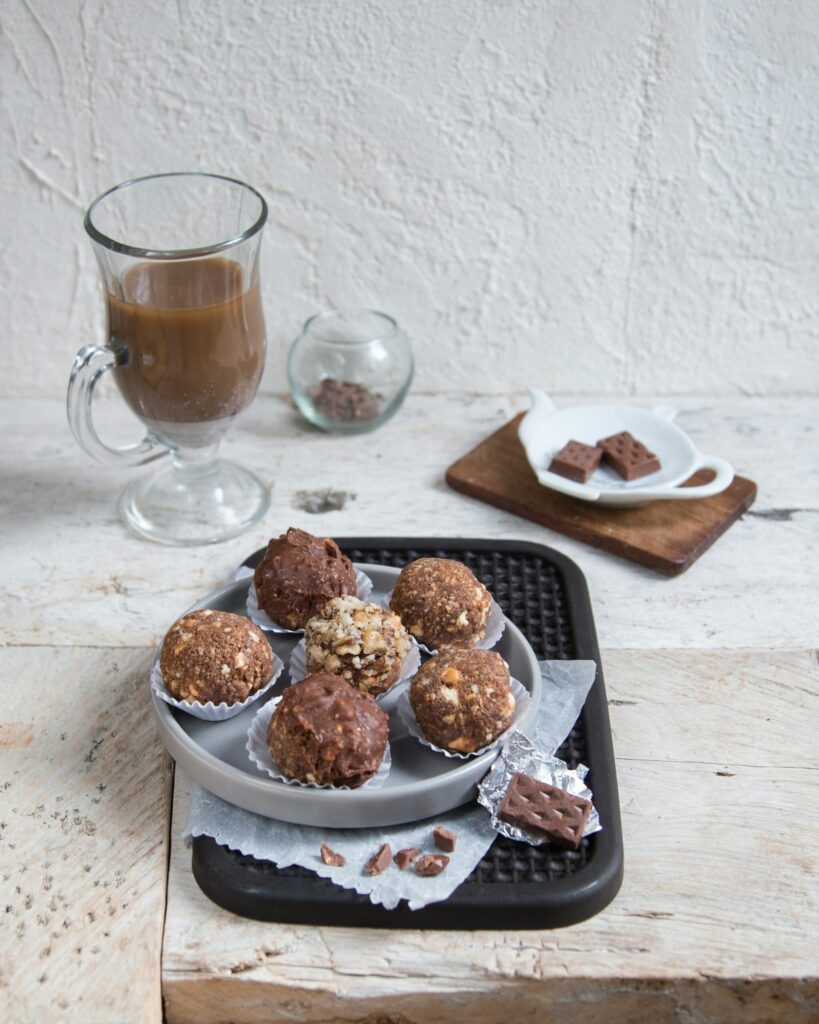
These no-bake peanut butter energy balls are the rare treat that sits comfortably in the dessert category while also being something you can eat before a workout with zero guilt. They are soft, fudgy, naturally sweetened with honey, and packed with the satisfying richness of peanut butter and the slow-release energy of oats. One bowl, fifteen minutes of actual effort, and no oven required. They keep in the fridge for two full weeks and in the freezer for three months, which means making a large batch is always the most sensible decision.
WHY YOU’LL LOVE THIS RECIPE
They genuinely taste like a peanut butter chocolate chip cookie in ball form. They satisfy a sweet craving, they keep you full for a surprisingly long time, and the ingredient list contains absolutely nothing to feel bad about. They are also brilliant for lunchboxes, travel snacks, and pre-gym fuel.
WHY IT WORKS
Rolled oats provide the structural backbone of the mixture, absorbing the moisture and oils from the peanut butter and honey to form a cohesive dough. Chilling the mixture before rolling firms it up because peanut butter solidifies slightly when cold, making the mixture much easier to handle and shape. The finished balls then continue to set firmer in the fridge, giving them that pleasant firm-on-the-outside, soft-on-the-inside texture that makes them so satisfying to eat.
No-Bake Peanut Butter Energy Balls
They taste like a peanut butter cookie, take 15minutes to make, and keep in the fridge for two weeks.
Ingredients
- 200g rolled oats (not quick oats or instant oats)
- 180g smooth peanut butter
- 80g runny honey or maple syrup
- 80g dark chocolate chips
- 2 tablespoons ground flaxseed (optional but adds a lovely nutty flavour and extra nutrition)
- 1 teaspoon vanilla extract
- A good pinch of fine sea salt
Instructions
Step 1 Combine all the ingredients
Add the rolled oats to a large mixing bowl. Make sure you are using regular rolled
oats, not quick oats or instant oats. Quick oats are more finely processed and
will absorb liquid differently, giving you a stickier, pastier dough that does
not hold together as well. Add the peanut butter, honey or maple syrup,
chocolate chips, ground flaxseed if using, vanilla extract, and the pinch of
sea salt. Use a sturdy spoon or clean hands to mix everything together
thoroughly until completely combined. This can take a minute or two of mixing
because the peanut butter is thick and needs some encouragement to coat all the
oats evenly. The finished mixture should feel thick and slightly sticky, and
when you press a small amount between your fingers it should hold together
without crumbling apart. If the mixture feels too dry and crumbles when
pressed, add one teaspoon more honey and mix again. If it feels too wet and
sticky to handle, add one tablespoon more oats and mix again. Make these
adjustments gradually, one small addition at a time.
Step 2 Chill the mixture
Cover the bowl with cling film or a clean cloth and place it in the fridge for 20 to
30 minutes. This chilling step is genuinely important and it is worth doing
even though it might seem unnecessary. When the mixture is warm from your hands
and the room temperature, it is quite soft and sticky and difficult to roll
into neat balls. After 20 to 30 minutes in the fridge, the peanut butter firms
up slightly and the oats absorb more of the moisture, making the mixture
noticeably easier to handle and much more pleasant to roll. Do not skip this
step.
Step 3 Roll the balls
Take the bowl out of the fridge. Before you start rolling, lightly wet your palms
with cold water and shake off any excess. Damp hands prevent the mixture from
sticking to your skin and make the rolling process much neater and easier. Use
a tablespoon or a small ice cream scoop to portion out a consistent amount of
mixture for each ball. This helps ensure all the balls are the same size, which
not only looks better but also means they all have the same chilling and
setting time. Roll each portion firmly between your palms in a circular motion,
applying gentle but consistent pressure, until you have a smooth, round ball.
Place each finished ball onto your lined baking tray or plate. Continue until
all the mixture has been used. Re-wet your hands every few balls as needed.
Step 4 Chill until firm and store
Once all the balls are rolled and on the tray, place the tray in the fridge for at
least 30 minutes until the balls have firmed up completely and are pleasant to
handle. At this point they are ready to eat immediately or to transfer to an
airtight container for storage. They are best eaten cold or at room temperature
after about 10 minutes out of the fridge.
Notes
Keeping your hands slightly damp while rolling makes an enormous difference to how the
mixture behaves. Dry, warm hands will cause the mixture to stick, tear, and
refuse to roll into neat balls. Cold, lightly damp hands give you much more
control. Re-wet your hands every two or three balls. Also, do not skip the
pre-rolling chill. It is tempting to skip it when the mixture looks like it
should be rollable already, but even 20 minutes in the fridge makes the whole
process significantly easier and neater.
Nutrition Information:
Serving Size:
20Amount Per Serving:Calories: 130kcalTotal Fat: 7gSaturated Fat: 2gSodium: 55mgCarbohydrates: 14g
VARIATIONS
Roll the finished balls in desiccated coconut, finely crushed oats, or a light dusting of cocoa powder for a different finish and an extra layer of flavour and texture. Chia seeds or pumpkin seeds can be added to the mixture along with the oats for extra crunch and nutritional value. Dried cranberries or raisins make a lovely swap for some or all of the chocolate chips if you prefer a fruity version.
SUBSTITUTIONS
Almond butter, cashew butter, or sunflower seed butter all work as direct substitutes for peanut butter and give slightly different but equally delicious flavour profiles. Maple syrup is the perfect vegan alternative to honey and produces a very similar result. For a nut-free version suitable for school lunchboxes, use sunflower seed butter which has a mild, pleasant flavour.
COMMON MISTAKES TO AVOID
The two most common issues are skipping the pre-rolling chill and using the wrong type of oats. Without chilling, the mixture is too warm and sticky to roll into neat, smooth balls. With quick oats instead of rolled oats, the texture of the finished balls will be pasty and dense rather than slightly chewy and satisfying. Also, adding too many oats to fix a sticky mixture can make the balls dry and crumbly. Add adjustments one small spoonful at a time and test the consistency after each addition.
SERVING SUGGESTIONS
Serve the energy balls straight from the fridge as a quick snack, a pre-workout bite, a lunchbox treat, or a light dessert with a cup of tea or coffee. They are also great for travel because they hold together well at room temperature for a few hours.
STORAGE
Store in an airtight container in the fridge for up to 2 weeks. They can also be frozen in a single layer on a tray and then transferred to a freezer bag or container for up to 3 months. To eat from frozen, let them thaw at room temperature for 10 to 15 minutes.
FAQS
Can I make these vegan?
Yes, very easily. Use maple syrup in place of honey and make sure your chocolate chips are dairy-free. Most dark chocolate chips are already vegan but it is always worth checking the label.
Why are my balls not holding together?
The most likely reason is that the ratio of wet to dry ingredients is slightly off in your batch. Different brands of peanut butter vary in their oil content, which affects how the mixture holds together. Add one teaspoon more honey and one teaspoon more peanut butter and mix thoroughly, then test a small ball again. Repeat if needed.
Can I use crunchy peanut butter?
Yes, absolutely. Crunchy peanut butter adds a lovely texture with small pieces of peanut running through the balls. The mixture may need a tiny bit more honey to bring it together since crunchy peanut butter can be drier than smooth, but just add it gradually until the consistency feels right.