A silky, indulgent cheesecake packed with peanut butter and dark chocolate, set on a crushed Oreo base. No oven needed. Just 20 minutes of prep and the fridge does the rest.
This no-bake chocolate peanut butter cheesecake is the kind of dessert that makes people think you spent all day in the kitchen. You did not. The Oreo crust comes together in minutes, the filling needs nothing more than a bowl and a mixer, and the fridge does all the actual work. Rich, silky, and completely over the top in the best possible way. If you love chocolate and peanut butter together, this one is going to become a regular in your kitchen.
WHY YOU’LL LOVE THIS RECIPE
There is no oven, no water bath, and no cracked top to worry about. Just a deeply chocolatey, peanut buttery cheesecake that sets perfectly overnight and slices beautifully every single time. It is also a brilliant make-ahead dessert because it needs the overnight chill anyway, so the hard work is always done before your guests arrive.
WHY IT WORKS
Cold cream cheese whipped until completely smooth creates a stable base that holds its structure when chilled. Peanut butter adds fat and flavour while also helping the filling set firm. The Oreo crust binds naturally with butter and does not need baking because the cookies already contain enough fat to hold together when compressed and chilled. Melting the chocolate and letting it cool before folding it into the cream mixture means it blends smoothly without causing the filling to seize or go grainy.
No-Bake Chocolate Peanut Butter Cheesecake
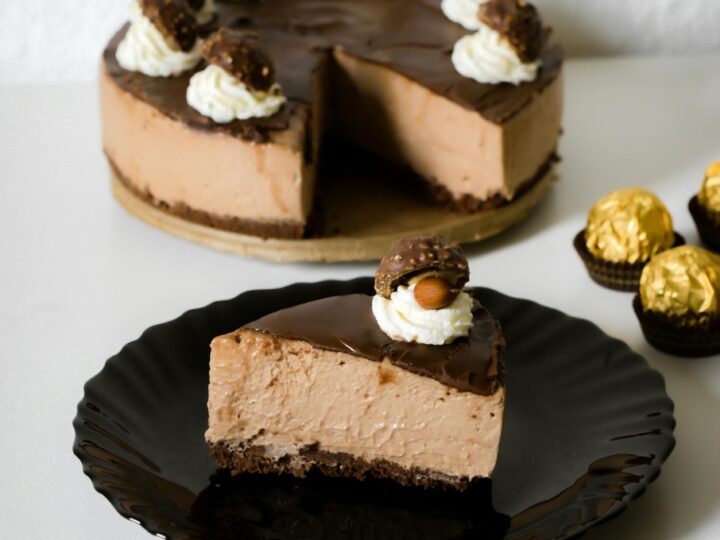
A silky Oreo-based cheesecake loaded with peanutbutter and dark chocolate. No oven, no water bath, no drama. Just an incrediblyrich and creamy dessert that sets overnight and slices like a dream.
Ingredients
- CRUST
- 300g Oreos
- 80g unsalted butter, melted
- FILLING
- 600g full-fat cream cheese, at room temperature
- 200g smooth peanut butter
- 150g icing sugar, sifted
- 200ml double cream
- 100g dark chocolate, melted and cooled to room temperature
- 1 teaspoon vanilla extract
- TOPPING
- 50g dark chocolate, melted
- 2 tablespoons smooth peanut butter, gently warmed
Instructions
Step 1 Make theOreo crust
Start
by lining the base of your 23cm springform tin with a circle of baking paper.
This makes it much easier to lift slices cleanly later. Add the Oreos to a food
processor and blitz until you have fine, even crumbs with no large chunks
remaining. If you do not have a food processor, place the Oreos in a sealed
zip-lock bag and crush them thoroughly with a rolling pin. Pour the melted
butter over the crumbs and pulse or mix until every crumb is evenly coated and
the mixture looks like wet sand. Tip the crumb mixture into the tin and use the
back of a spoon or the bottom of a flat glass to press it firmly and evenly
across the base. Press right up to the edges to make sure there are no gaps.
Pop the tin into the fridge while you get on with the filling. The crust needs
at least 15 minutes to firm up.
Step 2 Preparethe chocolate
Before
you start the filling, you need to melt your 100g of dark chocolate so it has
time to cool down before it gets folded in. Break or chop the chocolate into
small, even pieces and place them in a heatproof bowl. Either melt it over a
saucepan of barely simmering water, making sure the bowl does not touch the
water, or melt it in short 20-second bursts in the microwave, stirring between
each burst. Once fully melted and glossy, set it aside at room temperature to
cool. It should be completely cool to touch before you add it to the filling.
If it is even slightly warm it will melt the cream and ruin the texture.
Step 3 Make thecheesecake filling
Take
the cream cheese out of the fridge at least 30 minutes before you start so it
comes to room temperature. This is really important because cold cream cheese
will not beat smooth no matter how long you try. It will leave lumps in the
filling that you cannot fix later. Add the room temperature cream cheese to a
large mixing bowl and beat it on medium speed for about 2 minutes until it is
completely smooth, creamy, and free of any lumps. Scrape down the sides of the
bowl with a spatula and beat once more. Add the peanut butter, sifted icing
sugar, and vanilla extract. Beat again on medium speed until everything is
fully combined and the mixture is smooth. Now pour in the double cream and
increase the speed slightly. Whip the mixture until it is noticeably thicker
and holds its shape when you lift the beaters. This usually takes about 2 to 3
minutes. Do not overwhip or it will become stiff and grainy. Once thick, switch
to a spatula and gently fold in the cooled melted chocolate in two or three
additions, working slowly and carefully so you do not knock all the air out of
the filling.
Step 4 Fill thetin and chill
Take
your tin with the chilled crust out of the fridge. Spoon the filling onto the
crust in large dollops, then use the back of a spoon or a clean spatula to
spread it out into a smooth, even layer right to the edges. Give the tin a
gentle tap on the counter a couple of times to help the filling settle and
release any air bubbles. Smooth the top as neatly as you can. Cover the top of
the tin tightly with cling film, making sure the cling film does not touch the
surface of the filling. Place the cheesecake in the fridge and leave it to set
for a minimum of 8 hours. Overnight is ideal. The longer it chills, the firmer
and cleaner the slices will be.
Step 5 Add thetopping and serve
Once
the cheesecake has fully set and feels completely firm to a gentle touch, it is
ready to decorate. Melt the remaining 50g of dark chocolate gently and let it
cool slightly until it is fluid but not hot. Gently warm the 2 tablespoons of
peanut butter in a small bowl in the microwave for about 15 seconds until it is
loose and runny. Use a spoon or a small piping bag to drizzle the melted
chocolate over the top of the cheesecake in back-and-forth lines. Drizzle the
warm peanut butter over the top in the same way, going in the opposite
direction. If you want a swirled pattern, drag a toothpick or skewer lightly
through the drizzled toppings in sweeping curves. To release the cheesecake
from the tin, run a thin knife gently around the inside edge first, then
carefully unclasp the sides. For the cleanest slices, dip your knife in a jug
of hot water and wipe it dry between every single cut.
Notes
PRO TIPS
Room
temperature cream cheese is absolutely non-negotiable here. If it is even
slightly cold it will leave lumps in the filling that no amount of beating will
fix. Take it out of the fridge at least 30 minutes before you start, or up to
an hour if your kitchen is cool. For the cleanest, most professional-looking
slices, run your knife under very hot water, wipe it completely dry, then make
your cut. Repeat that process between every slice. It makes a huge difference
to the finished look.
Nutrition Information:
Serving Size:
12Amount Per Serving:Calories: 520ckalTotal Fat: 38ggSaturated Fat: 18ggSodium: 310mgmg
VARIATIONS
Swap the dark chocolate for milk chocolate if you prefer a sweeter, less intense result. Use almond butter or cashew butter instead of peanut butter for a slightly different but equally delicious flavour. Try adding a thin layer of good quality salted caramel sauce between the crust and the filling before chilling for an extra layer of flavour that works beautifully with the chocolate and peanut butter.
SUBSTITUTIONS
If you cannot find double cream, heavy whipping cream works just as well. Any chocolate sandwich cookie can replace the Oreos in the crust. Just make sure they are a similar size and texture so the crust holds together properly.
COMMON MISTAKES TO AVOID
The most common mistake is not chilling the cheesecake for long enough. The filling needs the full 8 hours to set firm enough to slice cleanly. If you try to rush it after 4 or 5 hours it will still be too soft in the middle. The second most common mistake is using reduced-fat or light cream cheese. These products contain significantly more water than full-fat cream cheese and the filling simply will not set. Always use full-fat.
SERVING SUGGESTIONS
Serve the cheesecake cold and straight from the fridge. It pairs really well with a small scoop of good vanilla ice cream alongside each slice, or an extra drizzle of warm peanut butter sauce poured over at the table. A small pinch of flaky sea salt scattered over each slice just before serving is also a wonderful finishing touch that cuts through the richness.
STORAGE
Store the cheesecake covered in the fridge for up to 4 days. It actually tastes even better on day two once the flavours have had more time to settle and meld together. If you want to freeze it, you can freeze the whole cheesecake or individual slices. Wrap tightly in cling film and then in foil and freeze for up to 1 month. Thaw overnight in the fridge before serving.
FAQS
Can I make this without a springform tin?
You can, but it is trickier. A deep 23cm loose-bottomed cake tin works reasonably well. A regular cake tin with no removable base will also work but you will need to cut and serve it directly from the tin rather than lifting it out, which makes presentation more difficult.
Why is my filling not setting?
The two most likely causes are that the double cream was not whipped enough before the chocolate was added, or that low-fat cream cheese was used instead of full-fat. The filling needs to be genuinely thick before it goes into the fridge. If it looks pourable rather than spoonable, it has not been whipped enough.
Can I use crunchy peanut butter?
You can, and it will add a nice texture to the filling. Just be aware that the filling will not be quite as silky smooth as it is with a good quality smooth peanut butter.