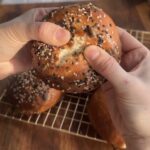
These sourdough buns take just 10 minutes of hands-on time but bake up soft, airy, and slightly chewy with a golden oat topping. They look simple, but the texture and flavor feel like something from a bakery.
Some recipes look simple on paper but feel intimidating when you actually start. This isn’t one of those.
This sourdough buns recipe is the kind you make once, and then it just sticks. Not because it’s fancy, but because it fits into your day without forcing you to plan everything around it.
You mix everything in one bowl, it looks a bit messy at first, and then you leave it alone. Hours later, you come back and the dough has quietly transformed. It feels lighter, softer, almost alive.
And when it finally goes into the oven, that smell hits. Slightly tangy, warm, comforting. The kind of smell that makes you check the oven every few minutes even though you know it’s not ready yet.
These buns come out soft enough to press gently without them tearing, but strong enough to hold a burger without collapsing. That balance is what makes them worth making again.
💛 Why You’ll Love This
You don’t need to keep checking or adjusting things constantly
It works even if your kitchen isn’t perfect or warm
The texture feels soft when you press it but holds its shape when you slice it
You get that slight sourdough flavor without it being too strong
And once you open one while it’s still warm, it’s hard not to eat more than planned
Why it works
Sourdough isn’t about speed, it’s about letting time do quiet work in the background.
When you first mix the dough, the flour hasn’t fully absorbed the water yet. That’s why it looks uneven and rough. As it rests, the flour slowly hydrates and the gluten starts forming on its own, which is what gives structure without aggressive kneading.
Keeping the dough slightly soft is one of the most important parts here. A firmer dough might feel easier to handle, but it almost always leads to heavier buns. This one should feel just a little sticky at first, that’s what gives you that soft interior later.
The long rest is where flavor builds. The sourdough starter breaks things down slowly, which is why these buns taste deeper than regular bread without needing extra ingredients.
The second rest after shaping might seem small, but it changes everything. Right after shaping, the dough is tight. Giving it time again relaxes it, so when it bakes, it expands gently instead of staying dense.
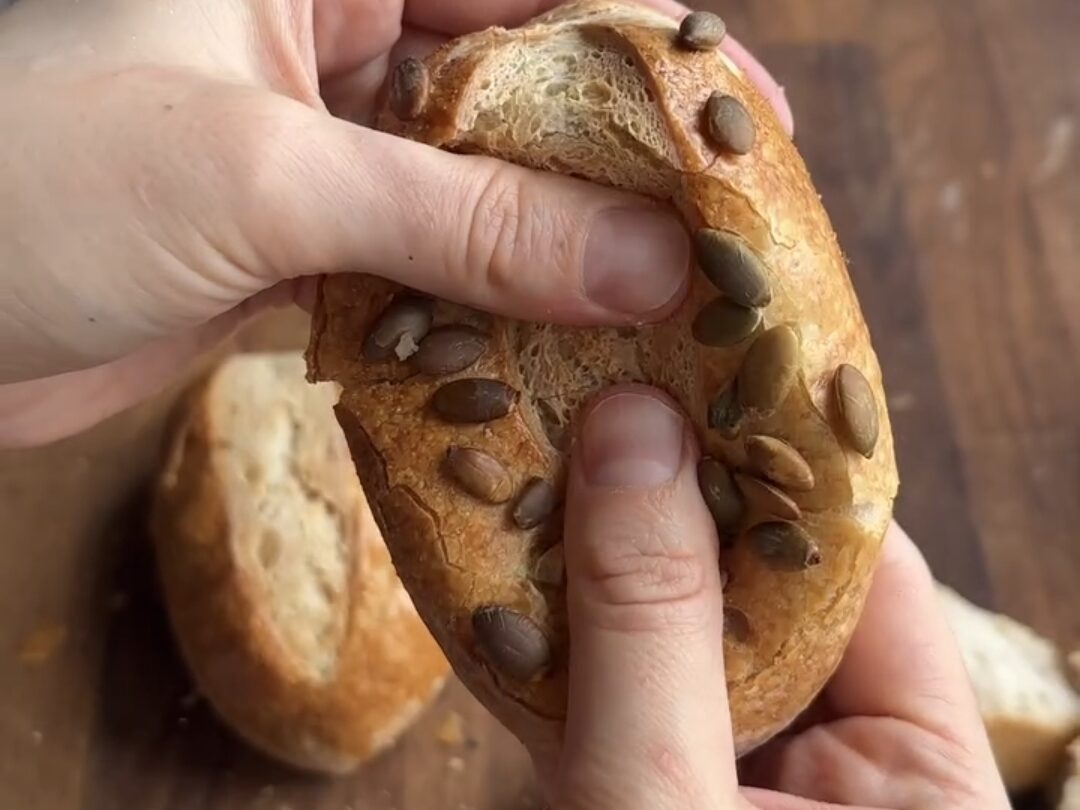
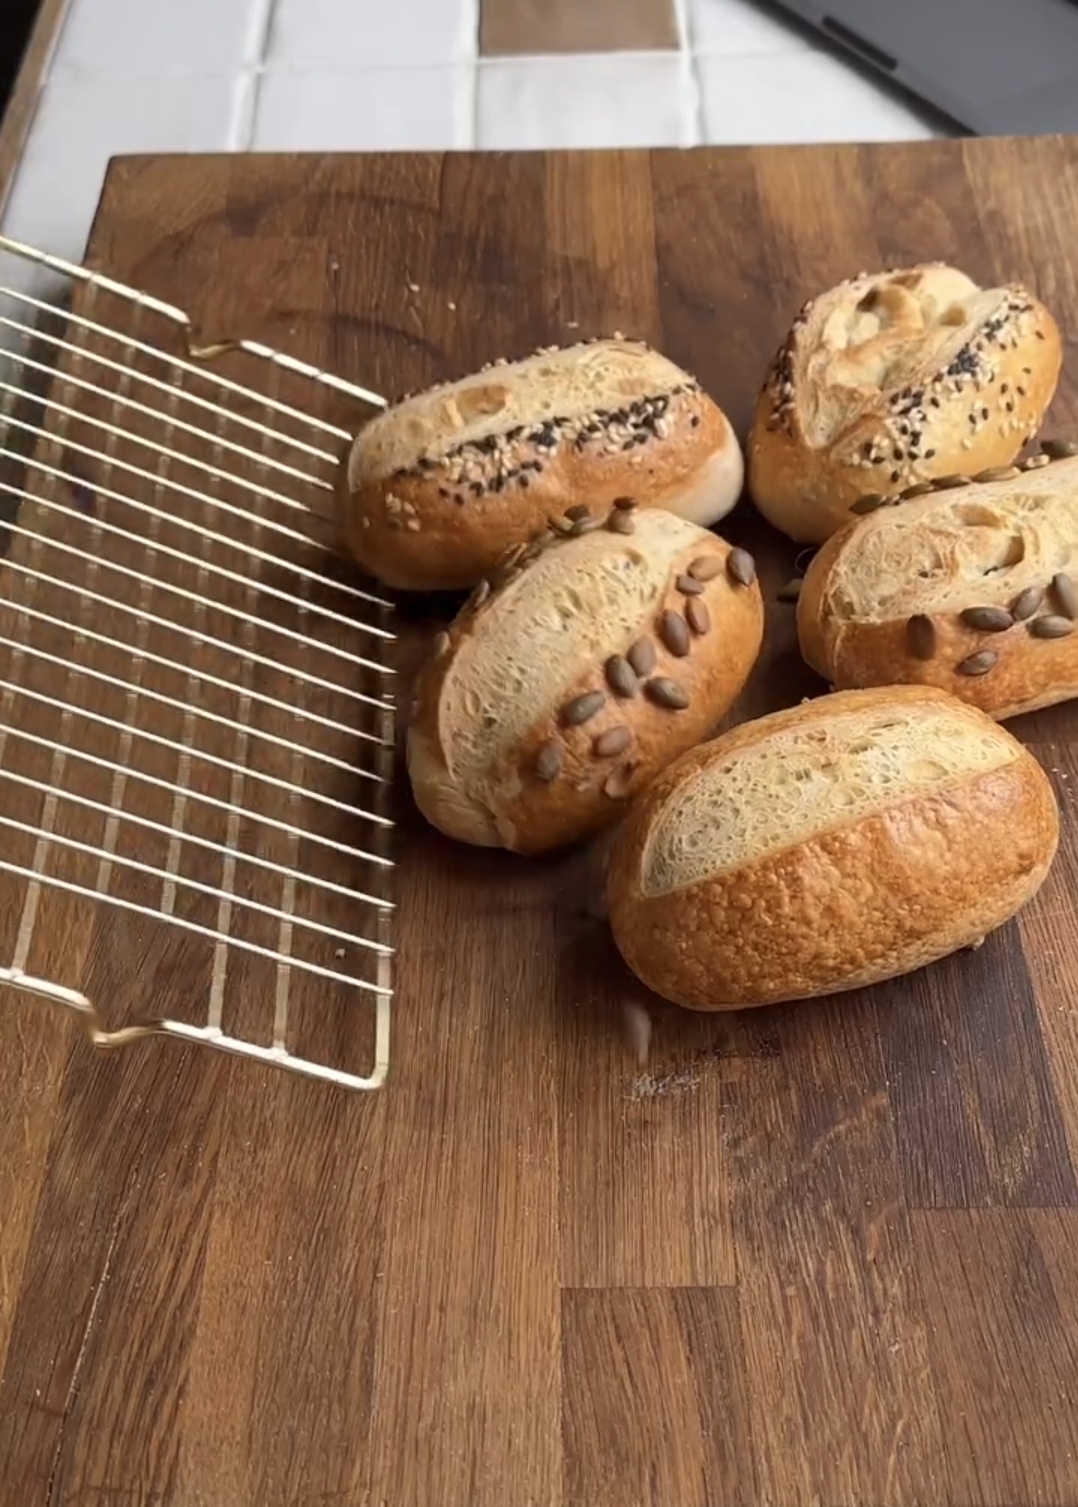
And the oat topping adds more than just looks. When it toasts in the oven, it gives a slight bite on top that contrasts with the soft inside, which is exactly what makes these feel like bakery buns instead of basic homemade ones.
10 Minute Sourdough Buns (Soft, Fluffy, Bakery Style)
Soft, airy sourdough buns with a light chew and golden oat
topping. This recipe takes only 10 minutes of hands-on time but gives you buns
that feel like they came from a bakery. Perfect for burgers, sandwiches, or
eating warm straight from the tray.
Ingredients
- 3 cups flour
- 1 cup active sourdough starter
- ¾ to 1 cup water
- 1 teaspoon salt
- ½ cup oat flakes
Instructions
Step 1
Add flour, sourdough starter, and most of the water into a bowl. Start mixing
with your hand or a spoon. At first it will feel uneven, with dry patches and
sticky parts. Keep going until everything is roughly combined. It should not
look smooth yet and that’s correct.
Step 2
Add the salt and begin kneading. In the first few minutes, the dough will stick
to your fingers and feel like it’s not cooperating. Resist the urge to add too
much flour. As you continue, you’ll feel it slowly tighten and smooth out.
After about 8 to 10 minutes, it should feel soft, slightly elastic, and just a
little tacky when you touch it.

Step 3
Cover the bowl and leave it undisturbed. Over the next several hours, the dough will slowly rise.
You might notice small bubbles forming on the surface and the
dough becoming smoother. When it’s ready, it won’t just look bigger, it will
feel lighter and airy when you gently move the bowl.
Step 4
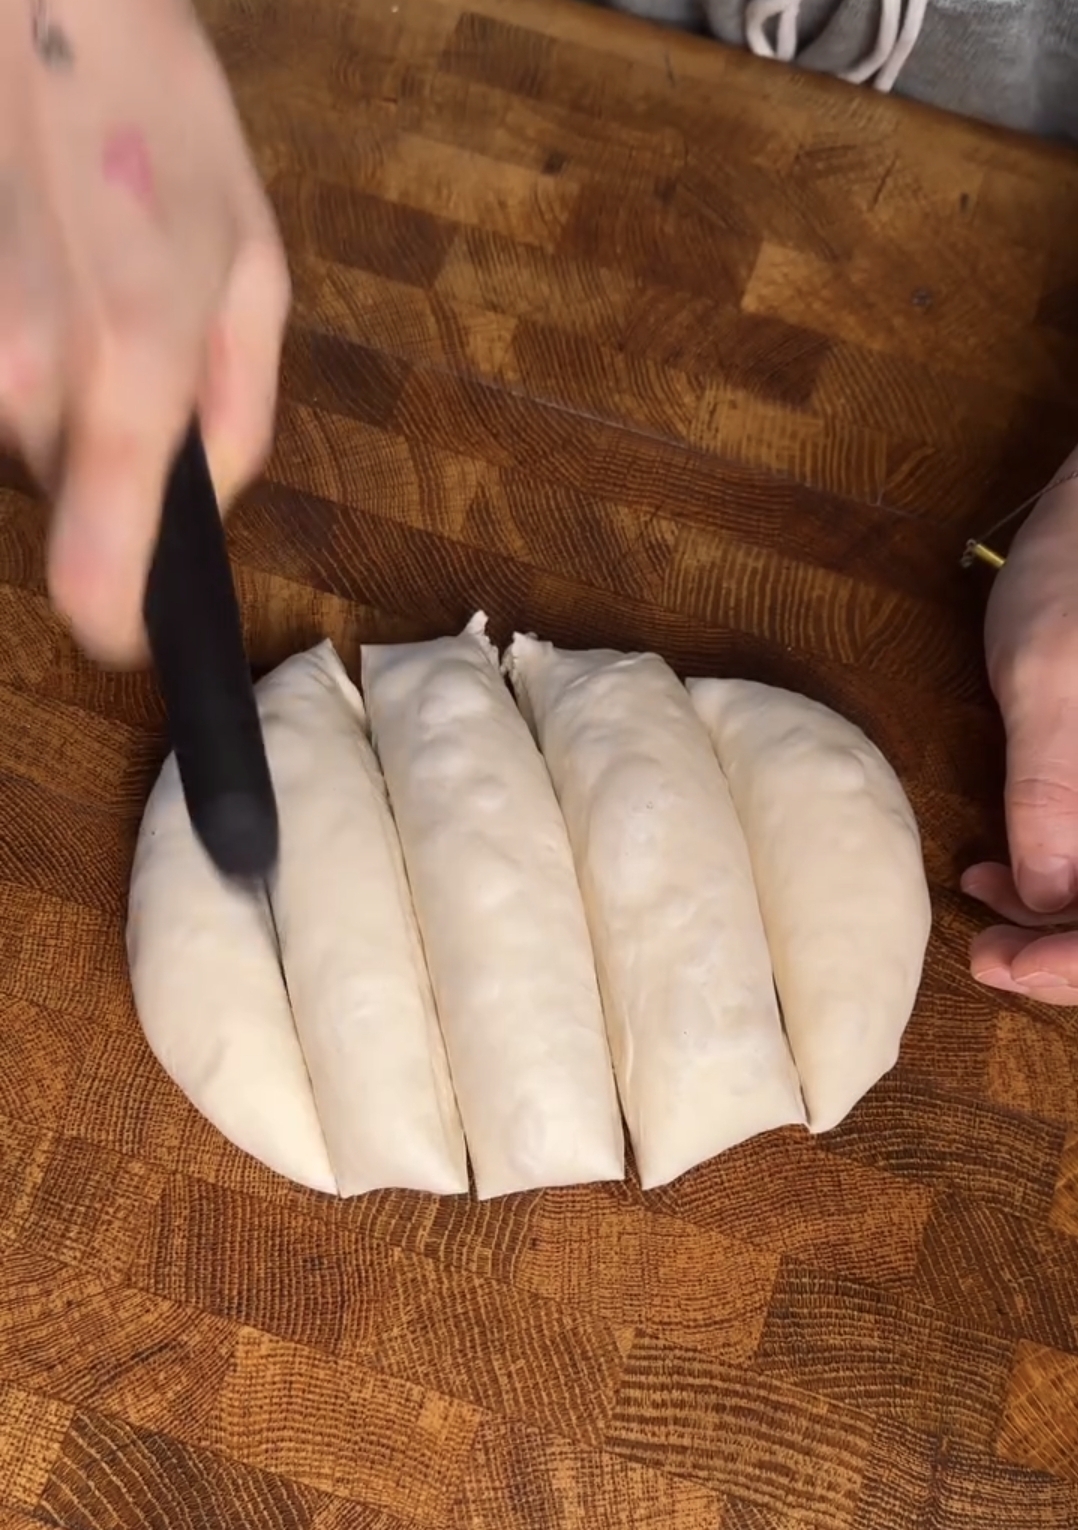
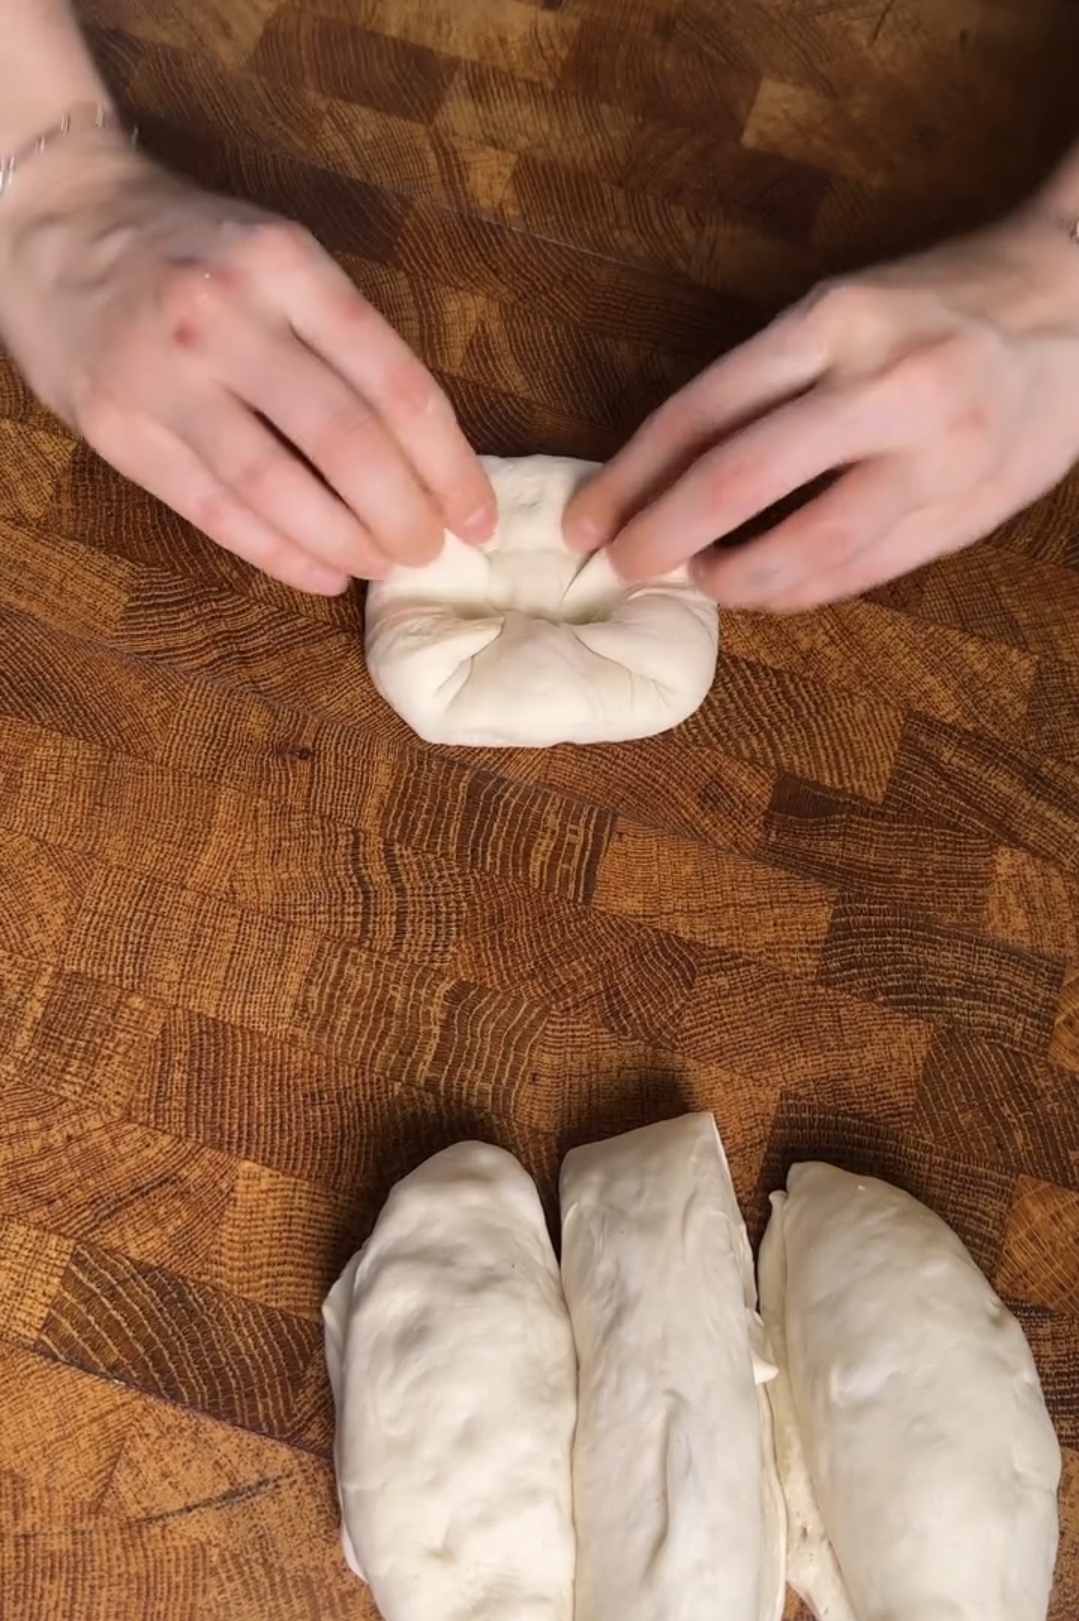
Turn the dough out carefully onto your surface. Try not to press down hard,
because that pushes out the air you just built. Divide into equal portions.
When shaping, pull the edges underneath each piece so the top becomes smooth and slightly tight. That tension helps the buns hold shape.
Step 5
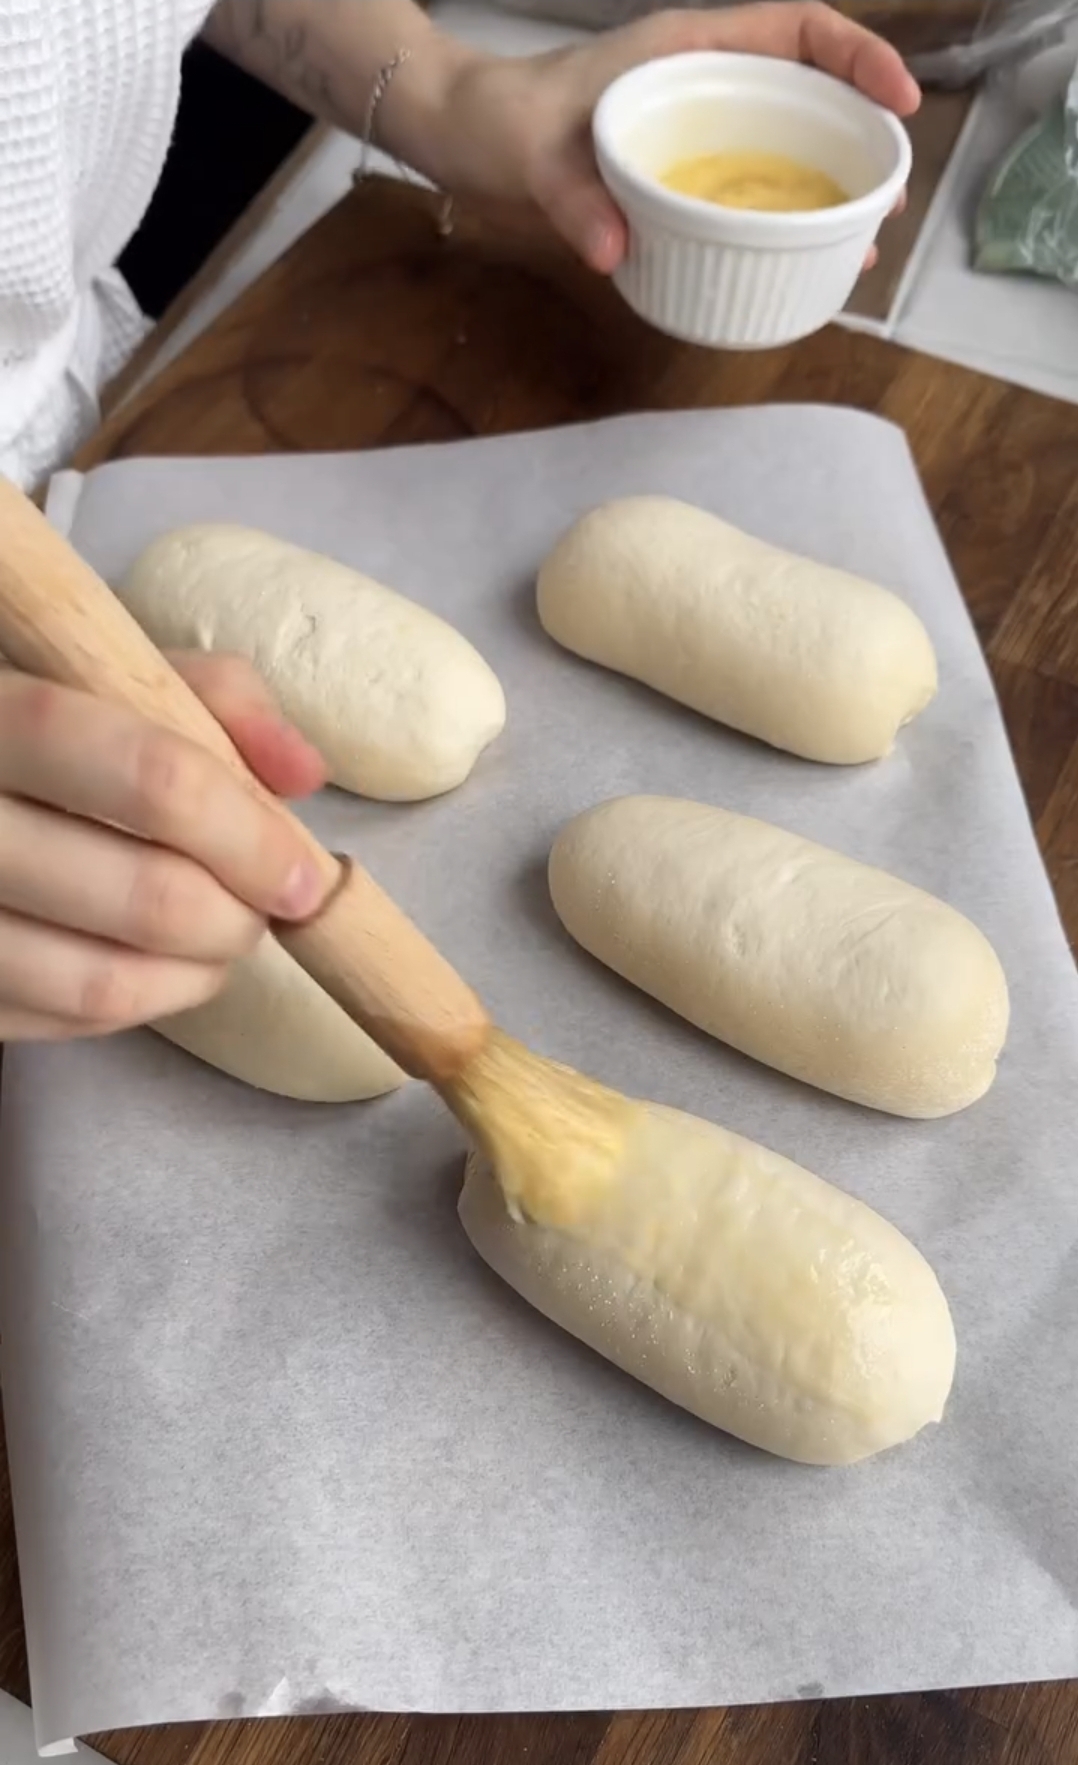
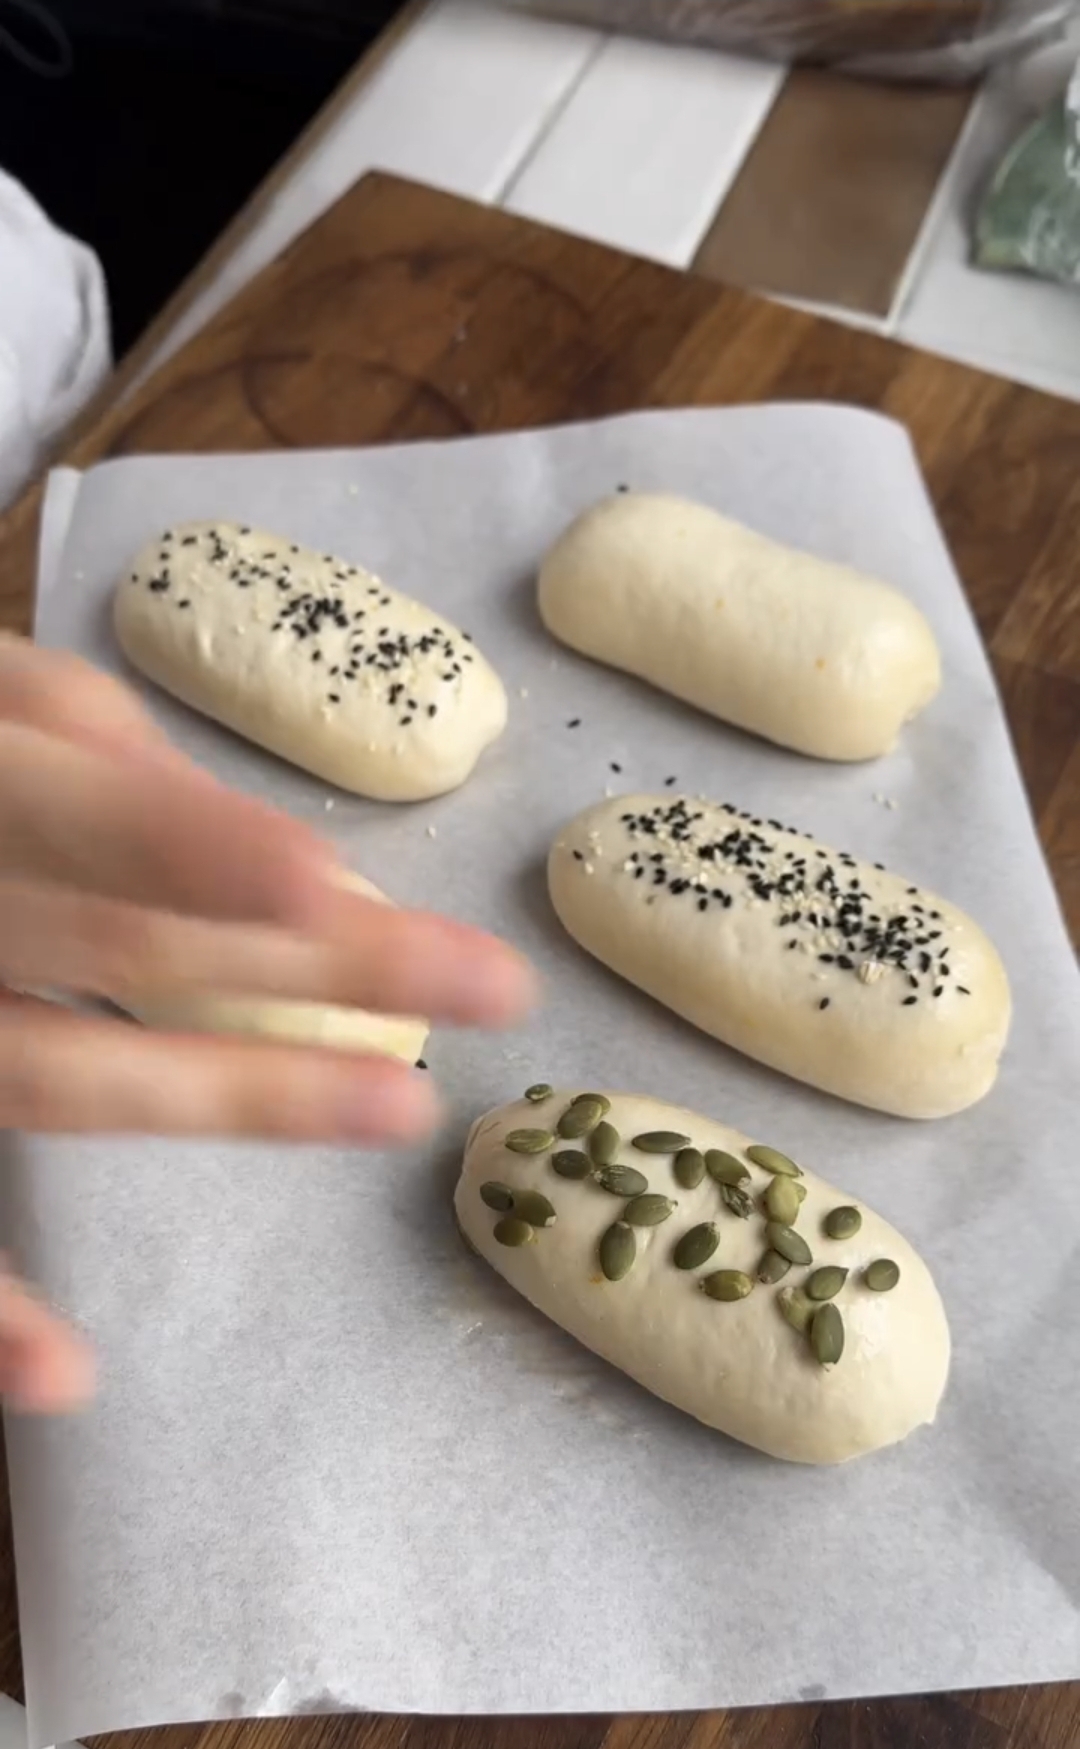
Dip your fingers in water and lightly touch the top of each bun. Then press oat flakes onto the surface.
Don’t push too hard or you’ll flatten the dough. A gentle press is enough to help them stick.
Step 6
Let the buns rest again. During this time, they relax and slightly expand. They
won’t double, but they should look a bit fuller. If you press lightly with your
finger, the indentation should slowly come back instead of snapping back
immediately

Step 7
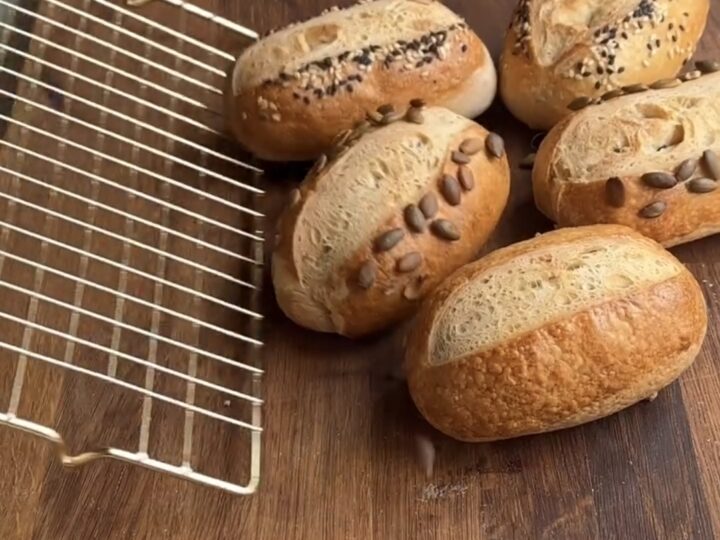
Place in a preheated oven at 200°C. After about 10 to 15 minutes, you’ll see
the tops turning golden and the oats lightly toasting. By the end, the buns
should feel light when lifted. Tap the bottom and listen for a hollow sound,
that’s your signal they’re done.
Step 8
Let them cool for at least a few minutes. If you cut too early, the inside can
feel slightly gummy. Once rested, tear one open and you should see a soft
interior with small air pockets.
Notes
If your starter doesn’t double after feeding, don’t use it
yet
If the dough feels slightly sticky, that’s a good sign for
softness later
If your kitchen is cold, fermentation will take longer and
that’s completely normal
Nutrition Information:
Serving Size:
10Amount Per Serving:Calories: 180kcal per bun
Variations
You can swap the oat topping with sesame seeds if you want a more classic burger bun look. Sesame adds a slightly nuttier flavor and a bit more crunch on top, which works really well for burgers.
If you prefer softer buns with a subtle richness, mix in a teaspoon of honey while adding water. It won’t make the buns sweet, but it slightly improves the texture and overall flavor.
For slider buns, divide the dough into smaller portions. Keep an eye on them while baking because smaller buns cook faster and can dry out if left too long.
If you want a more rustic look, don’t worry about shaping them perfectly. Slightly uneven buns still bake well and give a more homemade feel.
Substitutions
Bread flour can replace all purpose flour if you want a stronger structure. The buns will hold fillings better, especially for burgers, but may feel a bit chewier.
You can replace up to one third of the flour with whole wheat flour. Adding too much will make the buns heavier and less soft.
If the dough feels too dry while mixing, add water slowly, one tablespoon at a time. The dough should feel soft and slightly sticky, not stiff.
If you don’t have oat flakes, you can skip them or use seeds like sesame or flax. The buns will still turn out good, just with a different texture on top.
Common Mistakes
Using a weak or inactive sourdough starter is the most common reason buns turn out dense. If your starter doesn’t rise properly after feeding, it needs more time before using.
Adding too much flour while kneading makes the dough easier to handle at first, but results in dry and heavy buns after baking.
Skipping the second rest after shaping can lead to tight buns because the dough didn’t have time to relax.
Baking before the dough has properly risen often results in flat buns that feel dense instead of light.
Serving Suggestions
These buns are perfect for burgers because they stay soft but hold their shape without falling apart.
They work really well for breakfast sandwiches with eggs and cheese since they absorb moisture without getting soggy.
You can also slice and toast them lightly with butter for a simple snack.
Storage
Store the buns in an airtight container at room temperature for up to two days. Keeping them sealed properly helps maintain softness.
If you need to store them longer, freeze them once they are completely cooled. This helps preserve texture.
Avoid leaving them uncovered because they dry out quickly.
Reheating
For the best texture, warm the buns in the oven for a few minutes. This helps bring back the slight crisp on the outside while keeping the inside soft.
If you are in a hurry, microwave them for about 10 to 15 seconds. This makes them soft but removes some of the crust texture.
If frozen, let them thaw first and then warm in the oven so they don’t turn soggy.

FAQs
Can I really make these in 10 minutes?
Yes, but that 10 minutes only refers to the actual hands on work. The mixing and kneading take around 10 minutes, but the dough still needs several hours to rest and ferment. That resting time is what builds the texture and flavor, so it is just as important as the active time.
Why are my buns dense?
This usually comes down to the sourdough starter or the fermentation time. If your starter was not active and bubbly when you used it, the dough will not rise properly. Another common reason is cutting the resting time short. The dough should feel lighter and slightly airy before shaping. If it still feels tight or heavy, it needed more time.
How do I know if my starter is ready?
A ready starter should double in size within a few hours after feeding and have a bubbly, airy texture. It should smell slightly tangy but not overly sour. If it looks flat or hasn’t risen much, it needs more time before using.
Can I leave the dough overnight?
Yes, and it often improves the flavor. Leaving the dough overnight allows it to ferment more slowly and develop a deeper taste. Just make sure it is covered so it doesn’t dry out. If your kitchen is warm, check it earlier to avoid over fermentation.
What if my dough is too sticky?
A slightly sticky dough is actually a good sign for soft buns. If it feels too wet to handle, let it rest for 10 to 15 minutes first so the flour can absorb the water. If it is still too sticky, add a very small amount of flour while shaping, not during the initial mixing.
What if my dough feels too dry?
This usually means not enough water was added. You can fix this by adding water a little at a time and mixing it in well. The dough should feel soft and flexible, not stiff or cracking.
Why didn’t my buns rise much after shaping?
After shaping, the buns will not double like the first rise. They should just look slightly puffed and softer. If they stayed flat, the dough may not have fermented enough or the room temperature may be too low.
How do I know when the buns are fully baked?
The tops should be golden brown and slightly firm when touched. If you tap the bottom, it should sound hollow. They should also feel light for their size instead of heavy.
Can I make these without oat topping?
Yes, the oat topping is optional. You can leave them plain or use seeds like sesame. The buns will bake the same but with a different texture on top.
Can I freeze the buns after baking?
Yes, they freeze very well. Let them cool completely first, then store them in an airtight bag. When ready to use, let them thaw and warm them slightly in the oven to bring back the texture.